
Phishing Notifications: Part 2
Click Here For Part 1
In our last article, we talked about a trick that malicious sites use to gain access to your computer and send you obnoxious notifications. These look harmless, or even helpful, but can cause a lot of trouble for you. As promised, we are now here to discuss how you can get rid of these if they’ve crept onto your computer.
For Google Chrome, the instructions are as follows:
Open Chrome, then from the top right ⋮ menu, choose Settings.
Then select Security and privacy (1), then Site settings (2).
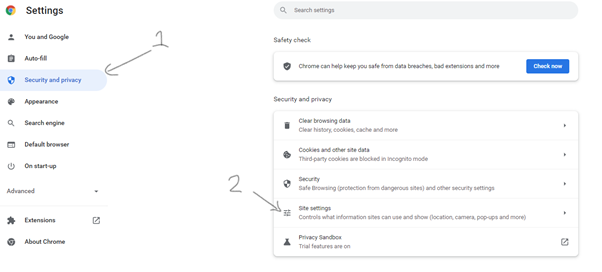
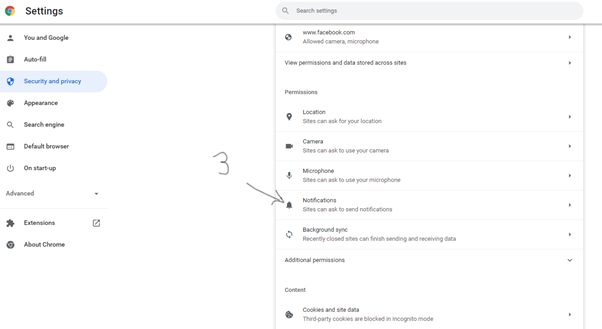
Scroll down to the Permissions section and select Notifications (3).
The next screenshot shows my (healthy) computer’s notification list. Notice that the allowed list is very short and most of them have a symbol next to them indicating that an extension requires them to function properly. I also have Hubspot and Facebook notifications enabled by personal choice.
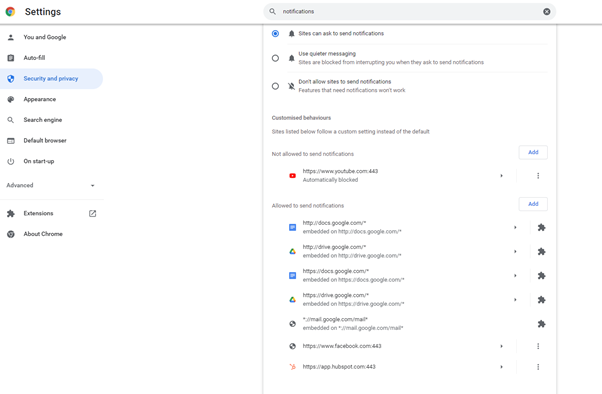
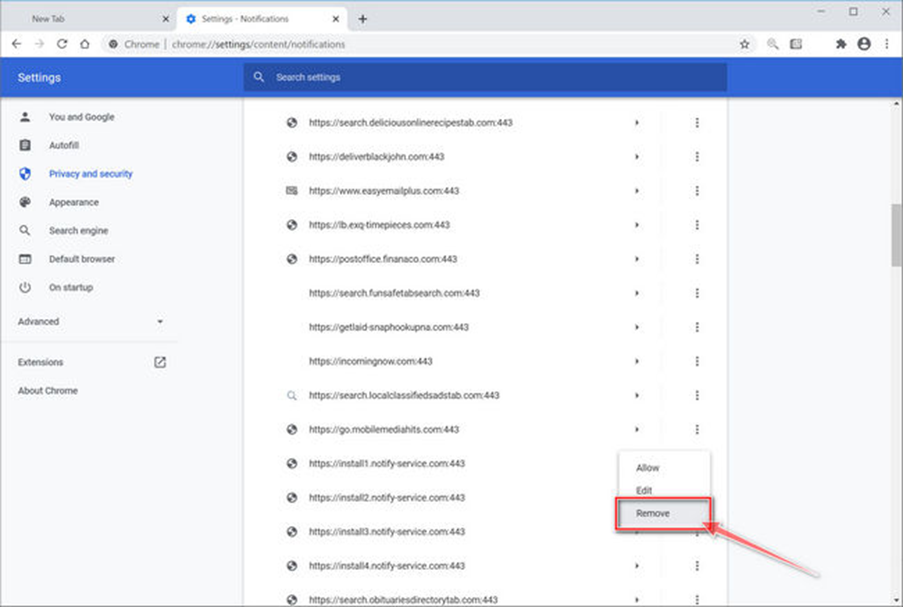
If your ‘Allowed to Send Notifications’ list looks like the image below, however, it is a good idea to right-click on the ⋮ next to each entry and select Remove to take it off the Allowed list unless it is something you are certain you want to keep. If it keeps reappearing, you can add the site URL to the blocked list.
If you are signed up to Protect-IT, our Web Protection module filters out requests going to these dodgy websites that are fishing for that permission in the first place, so the initial stage of adding the site to the Allowed list doesn’t occur.
For added peace of mind, if something has managed to sneak past that filter, the scan that SentinelOne EDR carries out each time something tries to run on your computer will ensure that no malicious code is able to start causing trouble.
One Comment